Restoring Classic Car Lights: A Simple Guide
Start with a thorough inspection of your classic car’s lights and lenses. Look for yellowing, cracks, or foggy appearance – these are common signs that restoration is needed.
Modern LED upgrades can make your classic car safer while keeping its vintage look. Just make sure to choose lights that match your car’s era and style. Many manufacturers now make LED bulbs that fit perfectly in original housings.
Check all wiring before installing new lights. Old or damaged wires can cause dim lights or electrical problems. Replace any corroded connections and use proper gauge wire for best results.
Finding original parts matters for authentic restoration. Search specialized classic car dealers, swap meets, and trusted online marketplaces. Keep photos of original parts handy to ensure replacements match exactly.
Clean and protect restored lights with UV-resistant sealant to prevent future yellowing. Regular maintenance helps preserve both function and classic appearance.
Assessing the Condition of Your Car’s Lighting System
Checking Your Classic Car’s Lights: A Simple Guide
Start with a basic check of your car’s lights and lenses to spot common problems. Look for water damage inside the light housings – you’ll see fog, moisture, or rust if there’s an issue. Next, check the light sockets where bulbs plug in. Bad sockets often look corroded or feel loose, which causes poor lighting and electrical problems.
Don’t forget to inspect all wiring. Look for bare wires or cracked insulation, as these can cause shorts or light failures. A quick wire check now prevents bigger problems later.
This simple inspection helps you catch problems early and keeps your classic car’s lights working properly. Focus on these three main areas: – Light housing moisture – Socket condition – Wire health
Cleaning and Polishing Yellowed Lenses
Yellowed headlight lenses can be restored to crystal-clear condition with a simple cleaning and polishing process.
Clean the lenses first with soap and water to remove surface dirt. Next, apply a plastic headlight polish with a soft microfiber cloth, working in circular motions to remove the yellow oxidation layer. For heavily yellowed lenses, use a dual-action polisher tool to speed up the process.
Finish by applying a UV-protective sealant to prevent the lenses from yellowing again. This coating creates a barrier against sun damage and keeps headlights clear, bright, and safe. The entire restoration process takes about an hour and can save hundreds compared to lens replacement.
Tips: – Work in a shaded area – Test products on a small area first – Wear protective gloves – Apply sealant evenly for best protection
Replacing Outdated Bulbs With Modern Alternatives
Switching to Modern Bulbs in Classic Cars
Modern LED and halogen bulbs make classic car lighting systems brighter, safer, and more efficient. LEDs use less power, last much longer, and shine brighter than old-style bulbs. Halogen bulbs create a focused, powerful beam that helps you see better at night while keeping your vintage car’s classic look.
Quick benefits of upgrading: • LED bulbs: Use 90% less power and last up to 50,000 hours • Halogen bulbs: Create crisp, white light that cuts through darkness • Both options: Easy to install and maintain classic car appearance
The switch to modern lighting improves your classic car’s safety and reliability while reducing maintenance needs. Most auto parts stores stock these bulbs, making replacements simple when needed.
LED Bulbs Advantages
LED Bulbs Make Classic Cars Better and Safer
LED bulbs are a smart upgrade for classic car lights, offering three main benefits: better energy use, brighter light, and longer life. These modern bulbs use much less power than old-style bulbs, which helps protect your classic car’s electrical system. They shine brighter, making night driving safer and more comfortable.
LEDs last much longer than traditional bulbs – often 10+ years of regular use. This means fewer replacements and less maintenance for your vintage vehicle. You won’t need to worry about changing bulbs frequently, letting you focus on enjoying your classic car.
The upgrade makes sense for any classic car owner who wants better lighting without compromising their vehicle’s electrical system. LEDs combine modern technology with classic style, making your vintage car both safer and more reliable.
Halogen Bulbs Upgrade
Halogen Bulbs: A Smart Upgrade for Classic Cars
Halogen bulbs bring modern lighting power to vintage vehicles, making nighttime driving brighter and safer. These bulbs last longer than old-style incandescent lights and create a clearer, more natural white light that helps you see better on dark roads.
Main Advantages: – Brighter light output means better visibility and safer driving – Longer-lasting bulbs reduce the need for frequent replacements – Better heat handling keeps the light strong and steady
What Makes Halogen Better: Halogen technology packs more light power into each bulb, lighting up more of the road ahead. The bulbs run hotter but more efficiently than old-style bulbs, which means they stay bright longer. Their white light matches natural daylight better than the yellow glow of traditional bulbs, helping your eyes spot obstacles more easily at night.
Whether you drive your classic car daily or just on weekends, halogen bulbs offer a practical upgrade that improves both safety and convenience.
Restoring Corroded Electrical Connections
Fixing Corroded Electrical Connections in Classic Cars
Bad electrical connections can cause dim lights and other problems in classic cars. The first step is finding the damaged spots – look for rust, green corrosion, or worn-out wire coverings.
Testing is simple: Use a basic multimeter to check if electricity flows properly through the wires. When you find bad connections, replace them with new wires that match your car’s original specifications.
Quick fix steps: 1. Cut away corroded wire ends 2. Use the right size wire and connectors 3. Add dielectric grease to stop future rust 4. Crimp connections tightly
This repair brings back proper electrical flow while keeping your classic car’s original character. Regular checks of electrical connections help prevent problems before they start.
Sourcing Authentic Replacement Parts
Finding Genuine Parts for Classic Cars
Getting the right replacement parts for your classic car is crucial for proper restoration, especially for lights and lenses. The key is knowing where to look and how to verify that parts are authentic.
Three reliable ways to find genuine classic car parts:
- Join Online Classic Car Groups Classic car forums connect you with experienced collectors who know where to find rare parts and can spot fakes. Members often share trusted seller recommendations and help identify correct part numbers.
- Buy from Trusted Dealers Look for established classic car parts suppliers with solid reputations. These dealers test and verify parts before selling them, helping you avoid counterfeit items.
- Visit Car Shows and Swap Meets Local car shows and swap meets let you inspect parts in person and build relationships with sellers. You’ll often find rare items that aren’t available online, plus get expert advice from other collectors.
Upgrading to LED Lighting for Improved Visibility
LED Lighting Upgrades: What Car Owners Need to Know
LED lights bring brighter, clearer visibility to classic cars while using less power than old-style bulbs. The switch to LEDs makes nighttime driving safer and reduces strain on your car’s electrical system.
Before installing LED lights, check your car’s wiring and light housings. Some vehicles need simple adapters, while others require new wiring or housing modifications. A quick test fit with LED bulbs helps spot potential issues early.
Though LED lights cost more upfront than traditional bulbs, they pay off through: • Longer lifespan (up to 10 years) • Lower power consumption • Brighter, more consistent light • Reduced maintenance needs
Many auto parts stores now stock direct-fit LED options for classic cars, making the upgrade process straightforward for most owners.
Benefits of LED Conversion
LED Lighting Upgrades for Classic Cars
Switching to LED lights makes classic cars safer and more reliable. These modern lights shine brighter, use less power, and run cooler than old-style bulbs. This makes them perfect for vintage cars with older electrical systems.
Main Advantages: – Last up to 10 times longer than traditional bulbs – Create brighter, clearer light for safer driving – Handle road bumps better due to no fragile filaments – Draw less power from your car’s electrical system – Run cool, protecting old light housings and wiring
LED upgrades improve both daily driving and long-term maintenance. You’ll get better visibility at night, spend less time changing bulbs, and protect your classic car’s original fixtures. The lower power use also puts less strain on vintage electrical systems, helping prevent electrical problems common in older vehicles.
These practical benefits make LED conversion a smart choice for any classic car owner looking to enhance their vehicle’s lighting while preserving its character.
Installation Process Overview
LED Light Installation for Classic Cars
Installing LED lights in your classic car is straightforward and keeps its vintage look while adding modern lighting. First, disconnect the battery for safety. Take out the old bulbs and clean the sockets thoroughly.
Check your LED kit’s instructions for voltage and wiring details. Most classic cars need simple plug-and-play LED bulbs that fit existing housings. Make sure each bulb sits firmly in its socket to prevent flickering or loose connections.
Before closing everything up, test all lights to confirm they work properly. Once installed, LED lights give your classic car better visibility and lower power use while preserving its authentic appearance.
Safety Tips: – Work in a well-lit area – Keep track of all removed parts – Double-check polarity before connecting – Test lights before final assembly
Troubleshooting: If lights don’t work, check: – Bulb orientation – Socket connections – Wiring polarity – Ground connections
Cost and Compatibility
Switching to LED Lights in Classic Cars: Cost and Fit
LED upgrades for classic cars involve two main factors: how much they cost and whether they’ll work with your car’s existing systems. While LEDs cost more upfront than old-style bulbs, they save money over time through lower power use and longer life.
Before buying LED lights for your classic car, check these key points:
- Price vs. Value: LED lights typically pay for themselves within 2-3 years through energy savings and fewer replacements
- Car Electrical System: Your classic car might need simple wiring updates to work with LED lights
- Finding the Right Parts: Look for LED lights specifically made for classic cars to maintain the original look
Many auto parts stores now stock LED options for vintage vehicles, making the switch easier than ever. If you’re unsure about compatibility, talk to a classic car specialist who can match the right LED lights to your specific model.
Remember: LEDs use less power, last longer, and shine brighter than traditional bulbs, making them a smart investment for most classic car owners.
Rewiring for Optimal Performance and Safety
Safe and Bright Classic Car Lights: A Simple Guide
Old car wiring causes dim lights and safety risks. Modern upgrades fix these issues and keep you safe on the road. Let’s make it simple:
Start with the basics: Replace old, worn wiring with new automotive-grade cables. This ensures your lights get the power they need to shine brightly. Think of it like replacing an old garden hose that’s kinked and leaking with a new one that delivers full water pressure.
Add protection: Install new relays and fuses. Relays work like traffic controllers, managing power flow to prevent overheating. Fuses act as safety valves, stopping electrical problems before they cause damage.
Secure connections: Use proper soldering and heat shrink tubing on all wire connections. This prevents moisture damage and keeps electricity flowing smoothly, just like sealing a water pipe prevents leaks.
These simple updates transform dim, unreliable lights into a bright, dependable lighting system that keeps you safe while preserving your classic car’s charm.
Preserving Vintage Aesthetics With Period-Correct Components
Keeping Classic Car Lights Looking Original
Classic car lights need both modern safety and authentic vintage looks. The right combination of original-style parts helps maintain your car’s historical value while ensuring proper lighting function.
Three main areas make lights look period-correct:
Light Bulbs and Lenses Choose bulbs that match your car’s original specs. Original or quality reproduction lenses keep the authentic look while providing proper illumination. Many classic car suppliers offer direct-fit options that look vintage but work better than old parts.
Original Hardware Use correct-style mounting brackets and screws. This means getting either restored original pieces or exact reproductions. Proper hardware not only looks right but keeps lights securely mounted.
Lens Care Clean and restore original lenses when possible instead of replacing them. Careful polishing removes yellowing and scratches. Special sealants protect the restored finish and prevent future damage.
These steps create safe, reliable lighting that stays true to your classic car’s original appearance.
Regular Maintenance to Keep Your Lights in Top Shape
Keeping Car Lights in Great Shape: A Simple Guide
Clean your classic car lights regularly with a soft microfiber cloth and gentle cleaner to maintain bright, clear lighting. Look for cracks or moisture in the housings, and check that rubber seals are in good condition to prevent water damage.
Test all lights monthly to catch problems early. Replace dim or burned-out bulbs right away – don’t wait for them to fail completely. Check wiring connections for signs of wear or looseness, and tighten them if needed.
Quick maintenance tips: – Wipe lights clean after each wash – Test all bulbs monthly – Fix loose connections immediately – Replace aging seals before leaks start – Use correct replacement bulbs
These simple steps keep your car’s lights working properly and looking great, while helping prevent electrical problems down the road.
Frequently Asked Questions
How Can I Prevent Moisture Buildup Inside Classic Car Lights?
Keep Classic Car Lights Dry with Simple Fixes
Regular checks and proper sealing prevent moisture from getting trapped in vintage car lights. Start by inspecting the rubber gaskets around each light housing – these seals keep water out. Replace any cracked, brittle, or damaged gaskets immediately.
Check lights monthly for early signs of moisture buildup, especially after rain or car washes. Look for foggy lenses or water droplets inside. If you spot moisture, remove the light housing and dry it thoroughly with a clean cloth. Apply silicone sealant around edges where gaskets meet the body for extra protection.
Consider adding small vent holes in the bottom of light housings to let trapped moisture escape naturally. This classic car maintenance trick helps air circulation while preventing long-term water damage to your vehicle’s lighting system.
What Tools Are Essential for DIY Classic Car Light Restoration?
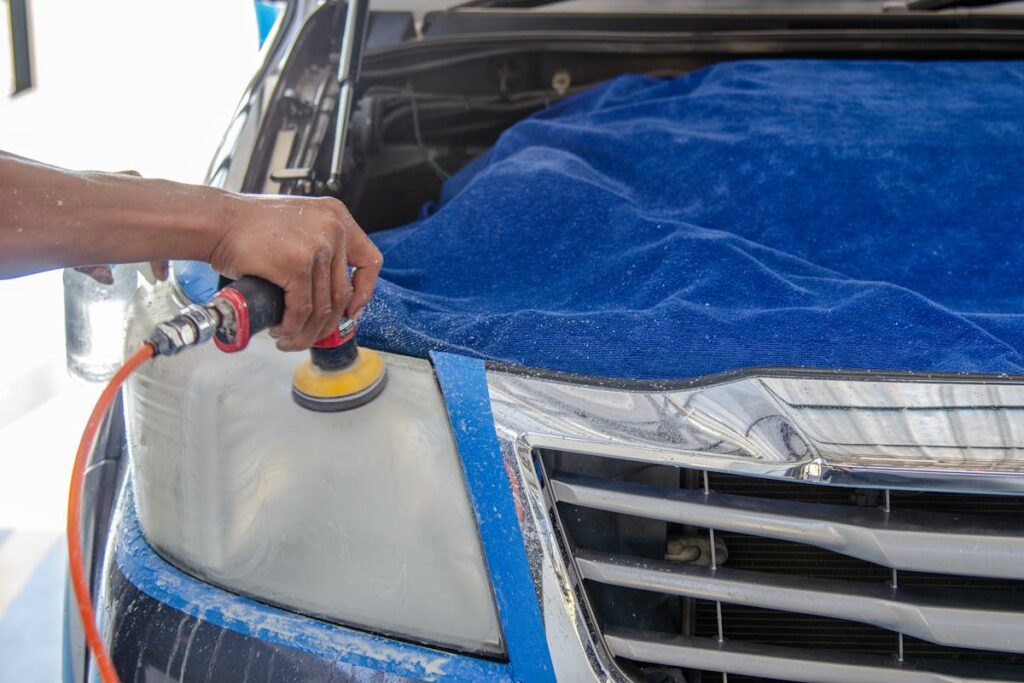
The basic tools needed for DIY classic car light restoration are a quality buffing wheel, a lens polishing kit, and protective equipment. A buffing wheel attaches to your drill or polishing machine to remove yellowing and scratches. The lens kit includes sandpaper, polishing compounds, and a UV sealant to protect your work.
Must-have items: • Electric drill or polishing machine • 3-inch buffing wheel attachment • Automotive lens restoration kit • Safety glasses and gloves • Microfiber cloths • Masking tape to protect paint • Clean water and spray bottle
These tools work together to transform cloudy, oxidized headlights into clear, bright lenses that improve both safety and appearance. With proper technique and the right tools, most DIY enthusiasts can restore headlights in about an hour per light.
Are There Specific Brands Recommended for Classic Car Lighting Products?
Best Brands for Classic Car Lighting
Top manufacturers for classic car lighting include both original equipment (OEM) and modern brands. Original-style bulbs from Bosch and OSRAM maintain authenticity, while Philips and Sylvania offer reliable LED upgrades for better visibility and safety.
For authentic restorations: – Bosch Classic Line – OSRAM Original – GE Period-Correct Bulbs – Wagner Vintage Series
For modern LED upgrades: – Philips Classic LED – Sylvania Classic Conversion – Oracle Lighting – United Pacific
Choose OEM-style bulbs when historical accuracy matters most. Pick LED conversions when you want better lighting performance while keeping a classic look. Many classic car owners keep a set of both – original bulbs for shows and LED upgrades for regular driving.
Remember: Check your local regulations about LED conversions in classic vehicles, as some areas have specific rules about modifying original lighting systems.
How Do I Safely Disconnect Wires From Fragile Vintage Sockets?
Safety First: Always disconnect power before working with vintage sockets.
To safely remove wires from vintage sockets:
- Turn off power and remove any batteries
- Get your needle-nose pliers ready
- Grip each wire connector gently but firmly
- Wiggle side-to-side with light pressure
- Pull straight out slowly when loose
Watch for signs of socket damage like cracks or loose parts. If a wire feels stuck, don’t force it – this can break delicate vintage components. Try rotating the connector slightly while pulling if needed. Clean the socket carefully after wire removal to prevent corrosion.
Pro tip: Take photos before disconnecting wires to remember their original positions for future reference or repairs.
Can Modern Lighting Upgrades Affect the Car’s Original Wiring System?
Yes, modern lighting upgrades can affect your car’s original wiring system. The main challenge comes from mixing new LED or HID lights with older wiring designed for traditional bulbs.
New lights often draw different amounts of power than original bulbs. LEDs use less power, while HID lights might need more. This mismatch can cause: – Flickering lights – Blown fuses – Damage to electrical components – Warning lights on your dashboard
To safely upgrade your lights: 1. Check your car’s electrical capacity first 2. Use proper conversion kits made for your car model 3. Install load resistors if needed 4. Have a professional check the installation
Modern lighting offers better visibility and style, but proper installation matters. Getting it right means your car’s electrical system stays healthy while you enjoy improved lighting.