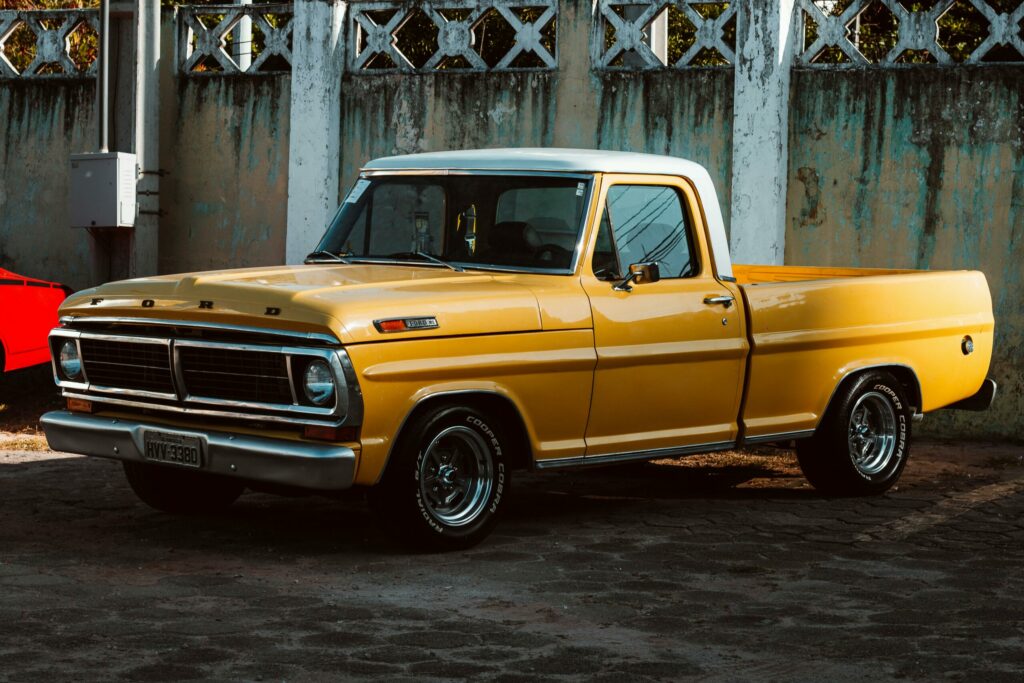
Classic Car Restoration: A Beginner’s Guide
Want to bring an old car back to life? Classic car restoration starts with three basic steps: inspecting the car, making a plan, and setting your budget. Think of it like a home renovation project, but for your dream car.
First, walk around the car and make a list of what needs fixing. Look for rust spots, damaged parts, and mechanical issues. Take photos and notes – these will help you track your progress.
Next, plan your restoration path. Decide if you’ll tackle everything at once or work section by section. Most beginners start with one area, like the engine or body work, before moving to the next.
Set a realistic budget and timeline. Classic car parts can be expensive, and restoration always takes longer than expected. Add 20% extra to your estimated costs for unexpected issues.
Remember: Start small, learn as you go, and don’t rush the process. Every restored classic car tells a story – yours is just beginning.
Assessing the Condition of Your Classic Car
Getting Started with Classic Car Assessment
Check your classic car’s condition thoroughly before starting any restoration work. This first step determines what repairs you’ll need and how much time and money to invest.
Start with a basic damage check: • Look for obvious body damage and rust spots • Test body panels with a magnet to find hidden rust • Use a bright flashlight to inspect dark corners and the underside • Check the engine bay for corrosion and leaks
Document everything you find: • Take clear photos of problem areas • Make a list of needed repairs • Mark severe issues that need immediate attention • Note parts that need replacement
Focus on rust and corrosion first, as these problems get worse over time and affect your car’s structure. Walk around the car systematically, checking each panel, the floor, and frame. This careful inspection saves time and money by revealing problems early, helping you plan your restoration project better.
Planning Your Restoration Project
Planning a Restoration Project: A Simple Guide
Start with a clear vision for your restoration project by asking two basic questions: What do you want to achieve, and how much work needs to be done? Your end goal might be creating a show-quality car or just a reliable everyday vehicle – this choice shapes all your next steps.
Make a simple project checklist: 1. Set your goal (show car or daily driver) 2. Check every part of the car 3. List what needs fixing 4. Create a step-by-step plan
Look closely at each car part – engine, body, interior, and electrical systems. Take photos and notes about what’s working and what isn’t. This helps you create a realistic plan and budget.
Write everything down in a clear project plan. This keeps you on track and stops the project from growing bigger than intended. A good plan helps you finish your restoration efficiently and avoid costly mistakes.
Establishing a Budget and Timeline
Setting Your Money and Time Limits for Classic Car Restoration
A solid budget and timeline form the foundation of any successful classic car project. Start by listing all expected costs – parts, tools, and labor. Add 20-30% extra for unexpected problems that often pop up during restoration work.
Money Planning: – Break down costs into major categories (body, engine, interior) – Research current market prices for parts – Get multiple quotes from suppliers and mechanics – Set aside emergency funds for surprises
Timeline Steps: – Map out major restoration phases – Set realistic completion dates for each task – Plan around parts delivery times – Allow extra time for learning new skills
Key tip: Keep your timeline flexible and your budget padded. Classic car projects often take longer and cost more than first expected, but good planning helps avoid major setbacks.
Track your progress with a simple checklist and adjust your plans as needed. Regular reviews of your budget and schedule keep the project on track and help prevent costly mistakes.
Disassembling the Vehicle
Taking Apart a Classic Car: Step-by-Step Guide
First, create a clear workspace and gather your tools – you’ll need labels, zip-lock bags, and a camera to document everything. Think of it like solving a puzzle in reverse.
Label and photograph each part as you remove it. Put small parts in labeled bags and take pictures from multiple angles before disconnecting anything. This creates a visual guide for reassembly later.
Mark all electrical wires with colored tape or tags before unplugging them. A simple numbering system (1A connects to 1B, etc.) prevents mix-ups when it’s time to put things back together.
Remove parts carefully to avoid damage. Classic car parts can be hard to replace, so treat each component gently. Work systematically from top to bottom, keeping related parts grouped together.
Store everything in a clean, organized space. Sort parts by system (engine, suspension, electrical) and keep your labels, photos, and notes in a project folder for easy reference.
Organize and Document Parts
Organizing and documenting parts is essential for successful classic car restoration. Break down the process into three simple steps:
Label everything as you take it apart. Use plastic bags and tags to mark each part with its name and location on the car. Small parts like screws and bolts should go in labeled zip-lock bags, while larger components need clearly marked storage boxes.
Take plenty of photos before and during disassembly. Snap pictures from multiple angles to show how parts fit together. These photos will be your guide during reassembly and help avoid confusion later.
Create a simple inventory list. Whether using a spreadsheet or notebook, record each part’s name, condition, and storage location. This makes finding parts quick and prevents losing pieces during the restoration process.
Good organization now saves time and frustration later. When you’re ready to put everything back together, you’ll know exactly where each part belongs.
Label Wiring and Connections
Labeling Wires Makes Classic Car Restoration Easier
Marking your wires and connections properly saves time and prevents mistakes during classic car restoration. Use simple tags to label each wire, noting where it starts and ends. Take clear photos and make basic diagrams of the wiring layout before you start – these will be your roadmap during reassembly.
Check wires for damage while you’re labeling them. Look for cracked insulation, corrosion, or weak connections. Test electrical parts to find problems early, so you can plan repairs ahead of time.
Color-coding and numbered tags help track complex wiring systems. Keep your labels waterproof and secure. Good labeling means safer, more reliable results and helps maintain your classic car’s original electrical setup.
Safely Remove Components
Removing Classic Car Components Safely
Start by labeling all wires and taking clear photos of each part before removal. Store bolts, nuts, and small parts in zip-lock bags, labeled with their location and purpose. Use the right tools for each job – correct-sized wrenches prevent stripped bolts, while proper screwdrivers protect delicate screws.
Remove parts in a logical order, working from top to bottom: – Dashboard and interior trim – Engine components – Suspension parts – Body panels
Keep a detailed notebook or digital log of each step. Take photos from multiple angles before disconnecting any parts. This documentation makes reassembly much easier later. Handle each component with care, protecting chrome, paint, and delicate parts from scratches or damage.
Store removed parts in a clean, dry area, organizing them by system or section. This careful approach saves time and prevents lost or damaged pieces during restoration.
Restoring the Chassis and Bodywork
Restoring a classic car’s body and frame requires careful attention to two main areas: fixing rust damage and aligning body panels correctly.
Start with rust repair – it’s the most important step to save your car’s metal structure. Sand or blast away rusty spots, treat the metal with rust-preventing chemicals, and weld in new metal pieces where needed. Think of it like treating a cavity in a tooth – you need to remove the damaged area and replace it with strong, new material.
Next comes panel alignment. This means getting all the car’s outer sheets of metal to fit together perfectly, with even gaps between them. Use special tools to adjust the panels and body filler to smooth out minor imperfections. Good alignment makes your car look better and helps it cut through the air more smoothly when driving.
A properly restored body not only looks great but also keeps your classic car safe and sturdy for years to come.
Rebuilding the Engine and Drivetrain
Rebuilding a classic car’s engine and drivetrain starts with the basics: taking everything apart, cleaning it thoroughly, and checking each part carefully.
The engine rebuild breaks down into three main steps: 1. Disassembly and cleaning of all parts 2. Checking for wear and damage 3. Fixing or replacing worn components
The transmission needs equal attention. Old gearboxes often show wear in their gears, bearings, and sync rings – the parts that make smooth gear changes possible. A proper rebuild makes sure your classic car shifts as smoothly as it did when new.
The differential, which sends power to the wheels, gets a thorough inspection too. Fresh bearings and seals help transfer power efficiently from the engine to the wheels, making the car drive like it should.
These repairs bring the car’s mechanical systems back to life, ensuring reliable performance and authentic driving feel.
Refurbishing the Interior
Restoring Classic Car Interiors: A Guide
Interior restoration makes your classic car feel as good as it looks. The process starts with choosing the right upholstery materials that match the car’s original style while adding modern comfort. Pick fabrics or leather that closely match the original colors and textures of your classic car’s era.
Focus on three main areas: 1. Upholstery: Replace worn seats, door panels, and headliner 2. Trim: Clean and restore dashboard components, door handles, and window frames 3. Details: Update steering wheel, gauges, and safety features
Start with a thorough cleaning of all surfaces. Replace damaged parts with authentic reproductions or carefully restored originals. Work systematically from the largest pieces (seats) to the smallest details (knobs and switches). When finished, your classic car’s interior will combine authentic vintage appeal with reliable functionality.
Expert tip: Take photos before disassembly to ensure correct reassembly of all interior components.
Reassembling and Testing the Vehicle
Putting Your Classic Car Back Together and Making Sure It Runs Great
Getting your restored classic car road-ready takes careful attention to detail and a step-by-step approach. This final stage turns all those restored parts into a smooth-running vehicle you can enjoy.
- Testing the Electrical Parts Check all electrical connections to make sure they work properly. Test the headlights, taillights, dashboard gauges, and turn signals. Replace any blown fuses and fix loose wires. A working electrical system keeps you safe on the road and helps avoid breakdowns.
- Making Sure Everything Works Test each major part of the car separately. Start the engine, shift through all gears, and check the brakes. Listen for unusual noises and watch for leaks. Each system needs to work on its own before they can work together.
- Taking It for a Test Drive Drive the car carefully to check how it handles. Test the brakes at different speeds, make sure it steers straight, and listen for any odd sounds. A thorough test drive reveals if your classic car is truly ready for regular use.
Achieving the Perfect Finish and Details
Getting Your Classic Car’s Perfect Finish
A stunning paint job and polished details make classic cars truly stand out. The key to success lies in choosing the right paint and following proper steps for application.
Paint Selection and Application: Choose between acrylic, enamel, or urethane paint based on your desired look and durability needs. Apply multiple coats, sanding between each layer until the surface feels smooth as glass. This step-by-step process creates that mirror-like finish classic car enthusiasts love.
Trim and Details: Polish or replace chrome parts to match your fresh paint. Clean trim pieces make body lines pop and highlight your car’s best features. Focus on smaller details like emblems, door handles, and window frames – these finishing touches turn a good restoration into a show-worthy classic.
Tips for Best Results: – Test paint colors on a small area first – Sand carefully between coats – Use quality polishing compounds – Clean chrome thoroughly before buffing – Check all trim pieces fit properly
Frequently Asked Questions
What Are the Best Resources for Sourcing Rare Car Parts?
When looking for rare car parts, you’ll find two main sources: online specialty stores and local salvage yards. Online retailers give you access to huge catalogs of parts and helpful experts who know their stuff. Salvage yards let you search through used parts in person, which can lead to great finds at better prices.
Online stores make it easy to search for specific parts, compare prices, and get detailed information about what you need. Many offer expert support through chat or phone to help you find the exact part for your car model.
Local salvage yards often have hidden treasures, especially for classic or discontinued cars. You can inspect parts firsthand, negotiate prices, and sometimes find rare components that aren’t available online. Plus, you might discover other useful parts while searching.
How Do I Ensure Authenticity With Replacement Parts?
Getting authentic replacement parts comes down to three key steps: checking part numbers, buying from trusted sellers, and verifying documentation.
To ensure you’re getting genuine parts: • Compare part numbers with your vehicle’s manual or manufacturer database • Purchase from authorized dealers or certified resellers • Keep records of part authenticity and purchase history • Join owner groups or forums to share trusted sources • Ask for certificates of authenticity when available
Avoiding counterfeit parts is crucial for safety and value. Fake parts can damage your vehicle and decrease its worth. When in doubt, contact the manufacturer directly or work with a certified mechanic who can verify part authenticity.
Remember: Original parts might cost more upfront but protect your investment and maintain your vehicle’s integrity in the long run.
What Are Common Pitfalls to Avoid in Classic Car Restoration?
Classic car restoration comes with several common mistakes that can cost you time and money. The biggest pitfalls include taking apart your car without properly labeling parts, underestimating costs, and rushing through important steps.
To avoid these problems: – Take photos before and during disassembly – Label and store parts in clearly marked containers – Create a detailed budget that includes extra funds for unexpected repairs – Make a realistic timeline for the project – Research proper restoration techniques for your specific car model
Smart planning and careful organization save both frustration and expense in classic car projects. Breaking down the restoration into manageable steps helps keep the work on track and prevents costly mistakes that could damage your vintage vehicle.
How Do I Maintain the Car Post-Restoration?
Keep Your Restored Car in Top Shape
Regular cleaning and basic maintenance keep your restored car looking and running great. Wash and wax the exterior monthly to protect the paint and prevent rust. Check under the car for any signs of corrosion, especially after wet weather.
Do quick mechanical checks every month: – Test all lights and signals – Check tire pressure and wear – Monitor fluid levels – Listen for unusual engine noises – Watch for leaks in the driveway
Store your car in a covered space when possible and use a high-quality car cover if parking outside. Drive the car at least twice a month to keep fluids circulating and prevent seals from drying out. This regular care helps preserve your restoration work and maintains the car’s value.
Can I Increase My Car’s Value Without Compromising Originality?
Yes, you can boost your car’s value while keeping it original!
Simple, smart improvements protect your car’s authenticity while making it more valuable. Start with these collector-friendly upgrades:
• Apply professional paint protection films to preserve the original finish • Install period-correct safety features like modern brake lines or LED lights • Keep detailed maintenance records and original documentation • Clean and protect original interior materials • Fix minor mechanical issues using factory-spec parts
The key is choosing reversible improvements that protect the car’s original features. Focus on maintenance and preservation rather than modifications. This approach keeps collectors interested while making the car more reliable and enjoyable to drive.
Remember: Any changes should be documented and reversible, ensuring your car maintains its historical value while becoming more desirable to future buyers.