
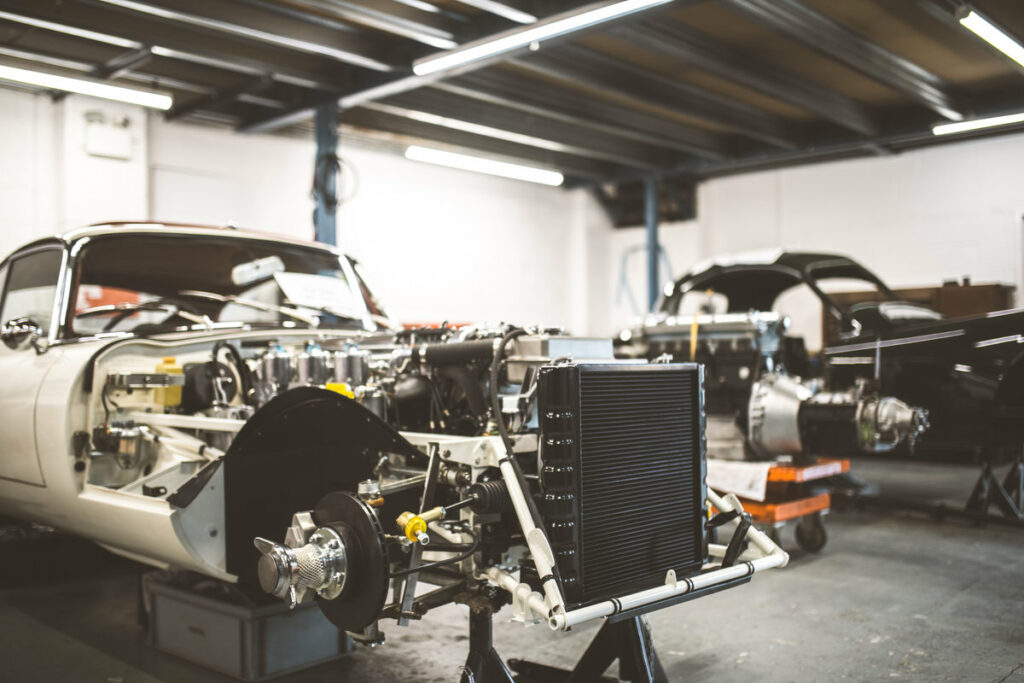
Getting Ready to Take Apart Your Classic Car
A clean, organized workspace is the key to successful classic car disassembly. Set up three clear areas: one for taking the car apart, one for storing parts, and one for trash. Keep your tools within reach on a solid workbench, with everyday items hung on a pegboard for quick access.
Always wear safety gear – no exceptions. Gloves, safety glasses, and sturdy shoes protect you while working. Take plenty of photos and notes of your car’s current state – these become your roadmap for putting everything back together later.
Before you start, gather these basics: – Large parts bins and labels – Basic hand tools – Camera for documentation – Protective equipment – Clean drop cloths – Good lighting
Ready to move forward? The next steps will guide you through the actual disassembly process.
Preparing Your Workspace
Setting Up Your Classic Car Workspace
A clean, organized workspace makes classic car disassembly safer and more efficient. Start by dividing your garage or work area into three main zones: a disassembly area, parts storage, and waste collection. Use tape or chalk to mark these zones clearly on the floor.
Keep your tools organized on a sturdy workbench where you can easily reach them. Install a pegboard on the wall for hanging frequently used tools, and use drawer organizers to sort smaller items. Clear plastic bins work great for storing car parts – label each one so you can quickly find what you need.
Good lighting is crucial – install bright overhead lights and keep a portable work light handy for detailed work. This simple setup prevents mistakes and helps you work faster and safer.
Gathering Necessary Tools and Equipment
Essential Tools for Classic Car Disassembly
Basic hand tools and safety equipment come first when taking apart a classic car. Start with a complete socket set, adjustable wrenches, Phillips and flathead screwdrivers, and sturdy pliers. Safety gear is non-negotiable – wear thick work gloves and protective eyewear to prevent injuries.
For heavy lifting, you’ll need specialized tools: a strong engine hoist (cherry picker), stable jack stands, and rolling dollies. These tools help move and support large car parts safely. Keep everything organized with storage bins and take photos of parts before removal to make reassembly easier.
Essential Hand Tools
Every DIY project starts with the right tools. Socket sets, wrenches, screwdrivers, pliers, and hammers make up the essential hand tools you need.
Socket sets come with different sizes to fit most bolts and nuts. Keep both standard and metric sizes handy. Wrenches are your go-to tools for turning fasteners – get adjustable, combination, and ratcheting types for different jobs.
Basic screwdrivers should include flathead and Phillips heads in a few sizes. For gripping and twisting, you’ll need pliers – regular and needle-nose work best. A solid hammer rounds out your toolkit, perfect for when parts need extra persuasion.
These common tools handle most home repairs and projects. Store them in an organized toolbox, and you’ll be ready to tackle basic repairs with confidence.
Protective Gear Importance
Safety Gear You Need for Classic Car Disassembly
Proper safety gear protects you from injury when taking apart a classic car. Always wear safety goggles to protect your eyes from flying metal, rust, and fluids. Choose goggles that meet safety standards and fit comfortably around your face.
Your lungs need protection too. Use a dust mask for basic work or a respirator when dealing with paint, rust, or chemicals. Pick the right mask based on what you’re working with – a simple dust mask works for light debris, but chemical work needs a proper respirator.
Protect your hands and feet with thick work gloves and steel-toed boots. This keeps you safe from cuts, falling parts, and sharp edges. The right gear lets you work confidently and prevents common workshop injuries.
Remember: Safety gear isn’t optional – it’s essential for every car project, no matter how small the job seems.
Specialized Equipment Needs
Tools You Need for Classic Car Disassembly
Basic tools aren’t enough when taking apart a classic car – you’ll need specialized equipment to do the job right. A good starter kit includes precision wrenches, torque multipliers, and panel removal tools that protect delicate car parts during disassembly.
Different classic car models need specific tools made just for them, especially for unique fasteners and fittings. For heavy lifting, you’ll want an engine hoist and dolly to safely move large parts like the engine and transmission.
Keep your workspace tidy with tool racks and storage bins – this makes finding the right tool quick and prevents damage to both tools and car parts. Quality tools might cost more upfront but save time and protect your classic car’s value during the restoration process.
Documenting the Vehicle’s Condition
Documenting Your Classic Car: A Simple Guide
Take clear photos and notes of your classic car before starting any disassembly work. This creates a reliable roadmap for putting everything back together later.
Start with photos: • Shoot all exterior angles • Capture interior details • Focus on specific parts and connections • Include close-ups of unique features
Make detailed records: • Write down part numbers • List measurements and specifications • Note any damage or rust spots • Mark parts’ original positions
Create an organized folder (digital or physical) with all documentation. This simple step prevents confusion during reassembly and helps track missing or damaged parts. Your future self will thank you for having clear reference materials when it’s time to rebuild the car.
Remember: Good documentation means easier restoration. Take more photos than you think you need – they’re free and invaluable later.
Systematic Approach to Disassembly
Taking Apart a Classic Car: A Simple Guide
Breaking down a classic car requires good planning and an organized workspace. Start by gathering your tools and creating a clean, well-lit area to work. Think of it like unpacking a valuable puzzle – each piece matters.
Label every part you remove with masking tape and a marker. Take photos with your phone before and during disassembly – these pictures will be lifesavers during reassembly. Store small parts in labeled zip-lock bags and keep them grouped by car section (engine, suspension, interior).
Follow your car’s service manual step-by-step. Never rush or skip steps. A careful disassembly now means a smoother rebuild later. Keep a notepad handy to write down any unusual findings or specific bolt locations that might not be obvious later.
Organize Tools and Workspace
A well-organized workspace makes classic car disassembly safer, faster, and more enjoyable. Set up your tools and space right from the start to save time and prevent frustration.
Tools Organization: Group your tools by type and size on pegboards or in tool chests where you can easily reach them. Keep frequently used tools closest to your work area. Use magnetic strips for quick access to wrenches and screwdrivers.
Workspace Layout: Create clear zones around your car for different tasks: – Main work area with plenty of space to move – Parts removal and sorting area – Cleaning station – Storage space for removed components
Lighting and Safety: Install bright lights to see all areas clearly. Make sure your space has good airflow. A well-lit, ventilated workspace helps you work safely and spot important details during disassembly.
This simple setup will help you tackle your classic car project efficiently while keeping everything organized and accessible.
Label and Document Parts
Keep Track of Classic Car Parts During Disassembly
Labels and careful documentation prevent lost parts when taking apart a classic car. Start by giving each part a unique number or code as you remove it. Take photos of parts in their original position before removal, and store small components in labeled zip-lock bags.
Create a simple parts inventory list with: – Part number – Name of part – Where it came from on the car – Current condition – Storage location
Use your smartphone to document everything, or keep a basic notebook with sketches and notes. Store related parts together in clearly marked containers. This organized approach makes reassembly easier and ensures no pieces go missing during your restoration project.
For extra security, take close-up photos of how parts connect and fit together. These visual references become invaluable during reassembly and help maintain your classic car’s original specifications.
Follow Step-by-Step Guide
Breaking Down Your Classic Car: A Simple Guide
Getting your classic car ready for disassembly starts with good planning and the right setup. Clear your workspace, make sure you have enough room to move around, and keep your tools within easy reach. A clean, organized area makes the whole job smoother and safer.
Start with a simple checklist that breaks the big job into smaller tasks. Think of it like following a recipe – each step builds on the last one. List what needs to be done, when to do it, and how long it might take. This prevents mistakes and keeps you on track. Having a clear plan helps you work confidently and protects your car’s valuable parts during disassembly.
Related terms and concepts: – Workspace layout and organization – Tool management – Task scheduling – Parts inventory – Safety precautions – Classic car restoration – Mechanical disassembly – Component storage
Properly Labeling and Storing Parts
Labeling and Storing Car Parts Made Simple
Label every part as you take your classic car apart – it’s the key to a hassle-free rebuild later. Use simple tags or markers to mark each piece, and consider using numbers or colors to group related parts together. Small parts like nuts and bolts go into labeled zip-lock bags, while bigger pieces need shelf space away from moisture and dust.
Quick Storage Tips: – Write clear, detailed labels that describe what each part is and where it goes – Take photos of complex assemblies before disassembly – Keep related parts together in labeled containers – Store parts in a dry, clean space – Make a simple checklist of all parts to track what you have
Create a basic inventory list with part names and locations – this acts as your roadmap during reassembly. Think of it like organizing a puzzle: when each piece has its place and label, putting it back together becomes much easier.
Handling Fragile and Rare Components
Fragile and rare car parts need special care to prevent damage and protect their value.
Store delicate components in padded containers and wrap them in soft, clean cloths to avoid scratches. When handling these parts, use the right tools – plastic tools or rubber-tipped pliers work better than metal ones for sensitive pieces.
Check your restoration manual or parts catalog to identify rare components before you start. If you’re unsure about handling a particularly valuable or fragile part, ask an expert classic car restorer for guidance.
Simple steps to protect fragile parts: – Label each piece clearly – Use protective padding – Handle with clean hands – Work on a cushioned surface – Keep parts in separate containers – Take photos before disassembly
These careful handling practices help preserve both the part’s condition and the car’s historical value.
Cleaning and Inspecting Removed Parts
Clean and Inspect Your Parts in 3 Simple Steps
After taking parts off your vehicle, clean and check them carefully before doing anything else. Start by writing down or photographing each part’s location and number – this makes putting everything back together much easier.
Use a gentle cleaner to wash off oil, dirt, and rust that might hide important markings or numbers on the parts. Avoid harsh cleaners that could damage older components. Look closely at how well-oiled each part is and check for signs of wear like scratches, dents, or uneven surfaces.
Pay special attention to areas where parts rub together – these spots often show the first signs of problems. If you find parts that look worn out or damaged, mark them for replacement. Good cleaning and inspection now prevents bigger problems later and keeps your vehicle running smoothly.
Troubleshooting Common Disassembly Challenges
Common Problems When Taking Apart Classic Cars
Taking apart a classic car doesn’t have to be overwhelming. Let’s break down the main challenges and their solutions.
Electrical Issues Old wiring in classic cars often causes problems. Use a simple multimeter to test connections and keep the car’s wiring diagram handy. Look for obvious signs like frayed wires or corroded connections first.
Time Management Break big jobs into smaller tasks. Set aside specific times for each part of the project. For example, dedicate one weekend to removing the engine parts and another to tackling the interior.
Parts Organization Label everything as you take it apart. Take photos before removing parts. Store small items in labeled plastic bags or containers. Group related parts together. This simple system makes reassembly much easier later.
These straightforward steps help keep your classic car project moving forward without confusion or delays. When in doubt, work slowly and document each step.
Ensuring Safety Throughout the Process
Safety First: Disassembling a Classic Car
Working on classic cars requires smart safety habits to prevent accidents. A clean, organized workspace helps you move freely and work efficiently. Good air flow keeps dust and fumes away from your lungs, while the right safety gear protects your body.
Must-do safety steps: 1. Clear your work area daily – put away tools and parts you’re not using 2. Wear safety gear every time – gloves protect hands, goggles shield eyes, masks keep lungs safe 3. Get fresh air flowing – use fans or ventilation systems to remove dust and fumes
These basic safety steps make classic car work safer and more enjoyable. When you protect yourself properly, you can focus on the joy of bringing that old car back to life.
Frequently Asked Questions
How Do I Identify Rare Components in a Classic Car?
Finding Rare Parts in Classic Cars: A Simple Guide
Looking at part numbers, date stamps, and factory markings helps identify rare classic car components. These markings tell you if a part is original and valuable.
Start with these key steps: – Check casting numbers and date codes stamped on parts – Look up the numbers in factory parts catalogs – Take clear photos of markings and components – Join classic car forums to connect with knowledgeable owners
Original factory parts often have: – Manufacturer logos – Production date stamps – Serial numbers – Factory paint marks or stickers
Compare parts against trusted reference materials: – Original service manuals – Factory parts books – Period advertisements – Restoration guides
When unsure, consult classic car experts, restoration specialists, or car club members who know your specific make and model. They can verify authenticity and help determine rarity.
What Are the Signs of Wear in Vintage Car Parts?
Common signs of wear in vintage car parts are easy to spot once you know what to look for. Oil sludge buildup means the engine hasn’t been properly lubricated, while worn bearing surfaces show where metal parts have rubbed together too much. You’ll also notice rough or pitted surfaces on moving parts, uneven tire wear, and rust spots in vulnerable areas.
Regular checks help catch these problems early. Look for: – Dark, sticky deposits around engine parts – Metal surfaces that feel rough or look scratched – Unusual noises when parts move – Visible cracks or rust patches – Loose or wobbly components
When you spot these warning signs, get the parts inspected by a vintage car specialist to prevent bigger problems later.
How Can I Assess the Value of Disassembled Car Parts?
Determining Used Car Part Values – Quick Guide
Check the part’s condition first – look for wear, damage, or rust. Good condition parts are worth significantly more than damaged ones.
Research current prices on popular auto parts websites, local salvage yards, and eBay Motors. Compare prices of the same part across multiple sellers to get a fair market range.
Key factors affecting part value: – Part age and mileage – Brand and authenticity – Supply and demand in your area – Vehicle make/model popularity – Original vs aftermarket quality
Rare or discontinued parts from classic cars often command premium prices, while common parts from everyday vehicles typically sell for less. Take clear photos and document any part numbers to help determine accurate values through online marketplaces.
For best results, join online car forums specific to your vehicle’s make and model – fellow enthusiasts often share reliable pricing information.
Is There a Recommended Order for Reassembling a Classic Car?
Yes, there’s a clear order for putting a classic car back together. Think of it like building with blocks – you need a strong foundation first.
Start with the car’s backbone: the chassis and frame. This gives you a solid base to work from. Next, install the engine, transmission, and other drivetrain parts. These are the car’s muscles and need to go in before anything else can work.
Once the mechanical parts are in place, tackle the electrical system and wiring. This is like setting up the car’s nervous system. Finally, add body panels, interior pieces, and trim work – the finishing touches that make your classic car complete.
Keep organized by: – Taking photos before disassembly – Storing parts in labeled containers – Following your car’s manual – Working in a clean, well-lit space
What Should I Do if I Lose a Critical Part During Disassembly?
Lost a Critical Part During Disassembly? Here’s What to Do
First, don’t panic. Stop what you’re doing and carefully search the immediate work area. Check your clothes, the floor, and any nearby surfaces where the part might have bounced or rolled.
If you can’t find it: – Take photos of the current assembly state – Check repair manuals for the part number and specifications – Search online parts databases or contact the manufacturer – Consider local hardware stores for temporary replacements – Keep remaining parts organized to prevent further losses
Pro tip: Create a safe “landing zone” with a light-colored towel or mat under your work area next time. This makes small parts easier to spot if they fall and prevents them from bouncing away.
Remember: Most lost parts can be replaced. Focus on finding the correct specifications rather than continuing assembly with a missing component, which could cause bigger problems later.