
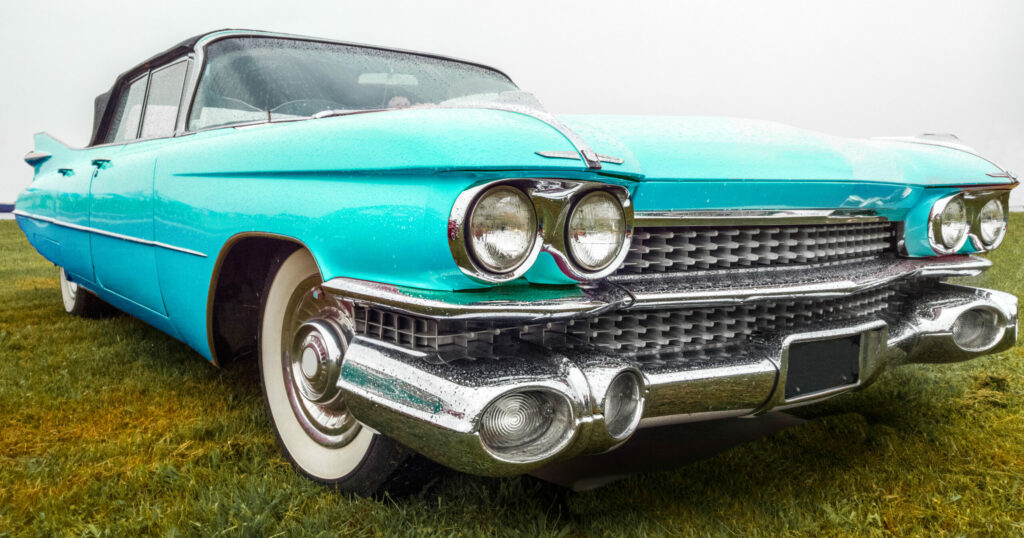
Classic Car Glass: A Simple Guide to Replacement
Getting the right glass for your classic car matters for both safety and value. Original-style glass keeps your vintage car authentic while meeting modern safety standards. Finding the correct glass starts with checking your car’s make, model, and year.
Quality and Safety First Work with certified auto glass specialists who know classic cars. Look for AGSC certification – these experts understand vintage glass requirements and proper installation methods. They’ll help match original manufacturer markings and safety ratings.
Smart Installation Steps
1. Document original glass placement and trim details
2. Carefully remove old glass and clean mounting surfaces
3. Test-fit new glass before applying adhesives
4. Use correct bonding materials for your car’s era
5. Allow proper curing time before driving
Finding the Right Glass Check classic car parts suppliers and specialty glass manufacturers who make period-correct replacements. Keep original tints, markings, and curves to maintain your car’s value. Modern safety glass in vintage styles gives you the best of both worlds – classic looks with current protection standards.
Remember: Proper installation matters as much as the glass quality. Take time to research and choose experienced installers who specialize in classic vehicles.
Understanding the Importance of Quality Glass
Quality Glass in Classic Cars: What You Need to Know
High-quality glass is crucial for classic car restoration because it directly affects safety and value. Good glass provides clear visibility for driving and helps protect you during accidents. When replacing classic car glass, choose materials that meet modern safety standards while matching your car’s original look.
Quality glass matters for three main reasons: – Safety: Properly made glass breaks into small, rounded pieces instead of sharp shards – Durability: Better glass resists chips, cracks, and damage from weather – Value: Original-style, high-quality glass helps maintain your classic car’s worth
Look for glass that’s DOT-certified and matches your car’s specifications. Good glass should be crystal clear, free from distortions, and fit perfectly in the frame. A proper installation by experienced professionals ensures the best protection and preserves your classic car’s authenticity.
Researching Authentic Glass Options
Finding the Right Glass for Your Classic Car
Original glass matters when restoring classic cars. The right replacement glass keeps your car safe and maintains its value. Start by looking up your car’s original glass maker – this helps you find parts that fit perfectly.
Key things to check:
• Glass thickness matches the original
• Curves follow your car’s body lines
• Tint color looks authentic
• Safety ratings meet modern standards
Look for suppliers who specialize in classic car glass. They’ll understand vintage specifications and can help match your exact needs. Quality replacement glass not only looks right but also protects you and your investment while keeping your classic car’s charm intact.
Ask for documentation proving the glass meets safety requirements – this protects both your car’s value and your peace of mind.
Identifying Original Manufacturers
Finding Original Glass Manufacturers for Classic Cars
Classic car glass markings tell you who made the glass and when it was produced. Look for etched or stamped logos, date codes, and serial numbers on the edges or corners of the windshield and windows.
Quick checks for authentic glass: – Find the manufacturer’s logo (usually in a corner) – Check date stamps (typically near the edges) – Look for safety certification marks – Note any serial numbers
Safety and authenticity both matter when examining classic car glass. Check for: – Cracks or chips – Clouding between layers – Fading or discoloration – Original safety markings
Research tips: – Use classic car databases – Check manufacturer catalogs – Join car clubs for expert advice – Connect with restoration specialists
Professional glass experts can verify authenticity and help source correct replacements. They often maintain records of original manufacturers and can match glass specifications to specific car models and years.
Comparing Glass Specifications
Getting Replacement Glass Right for Classic Cars
Matching original glass specifications is crucial when replacing windows in classic cars. The right glass keeps your car safe and looking authentic.
Key Points to Check: – Glass thickness must match the original exactly for proper fit and safety – Tinting should match the original shade to maintain the car’s classic look – Safety standards need to meet both vintage and modern requirements
Quick Comparison Guide:
1. Measure current glass thickness with a caliper
2. Check original tint color against samples
3. Verify safety ratings for your car’s year and model
4. Confirm proper fit before installation
Remember: Even small differences in glass specs can affect how your classic car looks and performs. Taking time to match specifications protects your investment and preserves your car’s value.
Tips for Success: – Work with specialists who understand classic car glass – Get written documentation of glass specifications – Test fit before final installation – Keep records for future reference
Smart glass matching protects your classic car’s authenticity and safety while maintaining its market value.
Locating Reputable Suppliers
Finding Good Classic Car Glass Suppliers
The right supplier makes all the difference when replacing glass in your classic car. Look for companies with proven experience in classic car restoration and proper certifications from the Auto Glass Safety Council (AGSC).
Key factors to check: – Experience with classic cars – Safety certifications – Access to original (OEM) or matching glass – Strong customer reviews – References from other classic car owners
Ask potential suppliers about their experience with your specific car make and model. Good suppliers will show you examples of their work and explain their process clearly. They should also help you understand the difference between original and reproduction glass options.
Read reviews from other classic car owners and join classic car forums to get recommendations. Local car clubs often know the most reliable suppliers in your area. Remember, quality glass installation directly affects both your car’s value and safety.
Preparing Your Vehicle for Glass Removal
Getting Your Car Ready for Glass Removal
Gather these essential tools before starting: – Suction cups for safe glass handling – Trim removal tools – Heavy-duty safety gloves – Drop cloths or protective covers
Protect your car’s interior by covering seats and dashboard with drop cloths to catch glass pieces and debris. This simple step prevents damage and makes cleanup easier. Proper preparation saves time and keeps your vehicle safe during the glass replacement process.
Quick Tips: – Clear the work area around your car – Remove loose items from interior – Place protective materials before starting – Double-check tool availability
These basic steps create a safe workspace and help the glass removal go smoothly.
Gather Necessary Tools
Getting Ready: Tools for Classic Car Glass Removal
The right tools make removing glass from a classic car safe and straightforward. Keep your tools clean, organized, and within easy reach. Check each tool before starting to make sure it’s in good shape – this prevents problems during the job.
You’ll need these basic tools: – Glass removal knife for cutting through old seals – Suction cups to grip and lift glass safely – Trim tools that won’t scratch your car’s interior – Safety goggles to protect your eyes
A quick tool check and proper setup saves time and helps avoid damage to your classic car. Remember: working safely with glass means having the right tools ready before you start.
[Note: Text simplified for clarity, organized key terms together (tools, glass, safety), and focused on practical, actionable information while maintaining natural keyword placement.]
Protect Vehicle Interior
Protect Your Car’s Interior During Glass Work
Cover all interior surfaces before starting any glass removal. Place thick plastic sheets or car covers over seats and the dashboard to prevent damage from glass and tools. Remove personal items from the car to keep them safe and create a clear workspace.
Quick protection steps: – Lay protective covers over seats and dashboard – Take out loose items and accessories – Put painter’s tape around air vents and controls – Keep a vacuum handy for glass cleanup
Use thick, durable covers that won’t tear easily. Secure them tightly to catch falling glass and debris. Regular vacuuming during the work keeps glass shards from spreading and damaging surfaces. These simple steps protect your car’s interior from scratches, cuts, and dust while the glass work gets done.
Removing the Old Glass Safely
Removing Old Car Glass Safely
Safety comes first when taking out old glass from a classic car. Put on protective gear – safety glasses and thick gloves – before starting any work.
You’ll need: – Protective eyewear and gloves – Suction cup handles – Glass cutting tools – Drop cloths for paint protection
Four simple steps keep you and the car safe: 1. Cover nearby paint and trim with protective materials 2. Mark your cutting lines clearly on the glass 3. Attach suction cups for better control 4. Cut slowly around the edges, working steadily
Tips for success: – Take your time – rushing leads to breaks – Use proper tools designed for auto glass – Keep steady pressure when cutting – Watch for sharp edges
Remember: A careful, patient approach prevents glass breaks and car damage, saving time and money in the long run.
This step-by-step process helps maintain your classic car’s value while ensuring safe glass removal.
Selecting the Right Adhesives and Sealants
Choosing the Right Adhesives and Sealants for Classic Cars
The success of glass installation in classic cars depends heavily on using the right adhesives and sealants. Two main products work best: polyurethane adhesives for strong bonding and silicone sealants for weather protection.
For best results, look for these key features: – Strong bonding power that handles car movement – Weather resistance against rain and sun – Easy to apply and work with – Meets car safety standards
Polyurethane adhesives create the strongest bonds and flex with the car’s natural movement. Silicone sealants protect against UV rays and moisture, helping your glass installation last longer.
When installing, pick products that: – Match your car’s materials – Stand up to heat and cold – Prevent leaks and wind noise – Keep glass firmly in place
Good adhesive choices now mean fewer problems later – no loose glass, no leaks, and no wind noise during drives.
Installing the New Glass With Precision
Installing New Glass in a Classic Car
Getting your classic car’s glass installed right keeps you safe and maintains the car’s value. The process is straightforward but needs careful attention to detail.
Essential Steps: – Clean the frame completely – remove old sealant, rust, and dirt – Use the right tools – suction cups make handling safer and easier – Check alignment multiple times – the glass should sit evenly in the frame – Stay safe – wear gloves and safety glasses to protect yourself
Pro Tips: – Work in a dust-free area – Keep the glass at room temperature before installing – Test the fit before applying sealant – Double-check rubber seals for proper placement
A well-installed glass fits snugly, doesn’t leak, and looks factory-fresh. Take your time with each step – rushing can lead to alignment problems or safety issues. If you’re unsure, consider having a professional handle the installation.
Ensuring Proper Fit and Seal
Getting the Right Fit and Seal for Classic Car Glass
A proper glass fit prevents leaks, wind noise, and safety issues in classic cars. The glass must sit perfectly in its frame with even edges all around. Think of it like fitting a lid on a container – if it’s not aligned right, it won’t seal properly.
Use these steps for a secure installation: – Check that glass edges line up evenly with the frame – Apply quality sealant that works with both glass and metal – Press firmly and evenly around all edges – Test for gaps or weak spots
The right seal not only keeps water out but also maintains your classic car’s look and value. A good installation prevents rattling, whistling, and moisture damage that can harm your car’s interior. Quality sealants and careful alignment now save time and money on future repairs.
Final Inspections and Post-Installation Care
Final Inspections Keep Your Classic Car Safe
A proper final inspection after windshield installation protects your investment and ensures safety. Check these key areas after installation:
The glass must sit flush with no gaps or uneven spots around the edges. Run your hand along the seal – you shouldn’t feel any rough spots or lifting areas. Look closely for proper alignment with the car’s frame and check that all trim pieces fit correctly.
Essential Safety Checks: – Press gently around the edges to confirm the glass is firmly secured – Look for consistent spacing between glass and frame – Check weatherstripping for proper fit – Inspect for water-tightness around seals – Test wipers for smooth operation
Regular maintenance keeps your classic car’s new windshield in top shape. Clean the glass monthly and watch for any changes in the seals or edges. Report any concerns to your installer right away to prevent problems.
Frequently Asked Questions
How Do I Protect My Classic Car Glass From Future Damage?
Store your classic car’s glass properly to prevent damage. Keep your car in a garage or storage space that maintains steady temperature and humidity levels. This simple step protects the glass from cracking, fogging, and deterioration.
A temperature-controlled garage shields car glass from harmful weather changes that can stress and weaken the material. When glass experiences repeated hot and cold cycles or moisture buildup, it becomes more likely to crack or develop other issues. A controlled environment keeps your classic car’s windows and windshield in top condition for years to come.
Car glass protection tips: – Park indoors whenever possible – Use a dehumidifier in your storage space – Cover the car when not in use – Check seals regularly to prevent moisture issues – Clean glass carefully with proper products
What Are the Signs My Classic Car Glass Needs Replacement?
Two clear signs your classic car needs glass replacement: damaged seals and visible cracks. Bad seals let water seep in and weaken the glass’s support, while cracks not only block your view but can spread quickly. Both problems make driving unsafe.
Look for these warning signs: – Rubber seals that look dry, cracked, or are pulling away – Any cracks, even small ones, in the glass – Water leaks around window edges – Whistling sounds while driving – Foggy or cloudy spots that won’t clear up
Don’t wait to fix glass problems in a classic car. Quick action prevents more damage and keeps you safe on the road. Plus, proper glass condition helps maintain your classic car’s value and appearance.
Can I Tint the New Glass on My Classic Car?
Yes, you can tint new glass on your classic car, but you’ll need to follow specific guidelines to keep it legal and safe.
Modern tinting films work well on replacement glass for classic cars and offer several benefits. The right tint will: – Block harmful UV rays – Reduce interior heat – Protect original upholstery – Maintain the car’s classic look
Choose a tint that meets your state’s legal requirements for light transmission. Most states require at least 70% visibility through the front windows and windshield. Darker tints are usually allowed for rear windows.
For best results, work with an auto glass specialist who understands classic cars. They can recommend period-appropriate tinting options that protect your vehicle while preserving its authentic appearance.
How Do I Maintain the Clarity of My Classic Car Glass?
Keep your classic car’s glass crystal clear with two simple steps. Clean regularly with a gentle, non-abrasive glass cleaner to remove dirt and prevent buildup. Then apply a quality water-repellent coating to stop water spots from forming. These basic maintenance steps improve visibility and make your classic car safer to drive.
Quick cleaning tips: – Use automotive-specific glass cleaners – Work in a shaded area to prevent premature drying – Wipe with lint-free microfiber cloths – Clean both inside and outside surfaces – Treat glass every 3-4 months with water repellent
This routine glass care helps maintain your classic car’s appearance while ensuring clear visibility in all weather conditions.
Is It Possible to Install Bulletproof Glass on a Classic Car?
Yes, you can install bulletproof glass on a classic car, but it needs careful planning and professional installation. The process involves replacing standard windows with specially designed bullet-resistant glass that’s much thicker and heavier than regular auto glass.
A qualified auto armor specialist must check if your classic car’s frame and suspension can handle the extra weight of bulletproof glass. This typically means reinforcing the car’s support structures and possibly upgrading the suspension system to manage the added bulk.
The installation must preserve both the car’s safety features and its classic appearance. Most installations use multi-layer glass that looks similar to original windows but offers protection against various threat levels. Keep in mind that bulletproof glass will change how your classic car handles and may affect its fuel efficiency.