
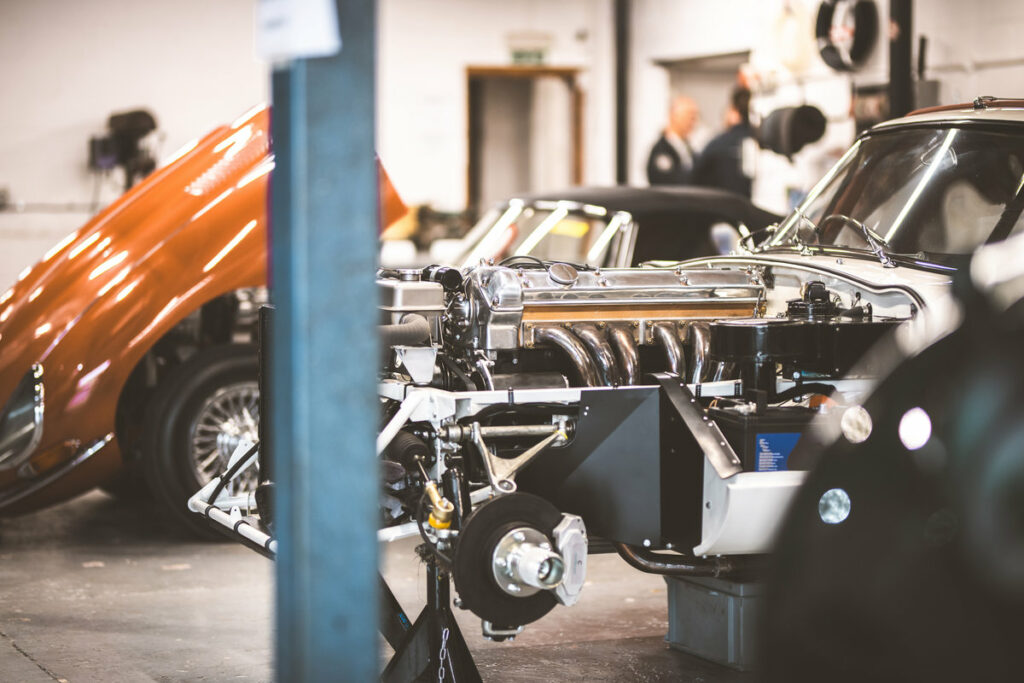
Putting a Classic Car Back Together: A Step-by-Step Guide
Getting your restored classic car back in one piece takes time and careful work, but it’s totally doable when you break it down into simple steps. Think of it like a big puzzle where every piece needs to fit just right.
Start with the basics – get the frame and chassis lined up first. This creates your car’s foundation, just like building a house. Next, drop in the engine and transmission, making sure they’re properly mounted and connected.
The suspension and brakes come next – these keep you safe on the road. Take extra care here, double-checking all bolts and connections. Then fit the body panels, adjusting them until gaps are even and doors close smoothly.
Wire up the electrical system using a clear diagram as your guide. Label everything as you go – this saves headaches later. Finally, install the interior pieces and test everything thoroughly. Drive the car at different speeds and listen for unusual sounds.
Remember: Take photos before and during reassembly. They’ll be your best reference if you get stuck. Keep all parts organized in labeled containers, and work in a clean, well-lit space.
Preparing Your Workspace
Setting Up a Safe Workspace for Classic Car Reassembly
Good lighting and steady temperature control make car restoration safer and more efficient. Install bright overhead lights and adjustable task lights so you can see small parts and details clearly. Pick lights you can move around as needed for different jobs.
Keep your workspace at a stable temperature and humidity level. This prevents rust on metal parts and stops wood or rubber components from warping. A comfortable room temperature around 65-75°F works best for most restoration work.
Your workspace should have: – Bright, movable lights – Even overhead lighting – Temperature controls – Good air circulation – Dehumidifier (if needed)
These basic setup steps help you work faster, spot problems early, and protect both you and your classic car during the rebuild process.
Organizing Parts and Tools
Keep Your Parts and Tools Organized
Label all car parts clearly as you take them apart – this simple step saves hours of confusion later. Use plastic bags or containers to store small pieces, and write detailed notes about where each part belongs. Take photos of complex assemblies before disassembly for quick reference.
Store your tools where you can easily find them. A pegboard on the wall or a rolling tool chest keeps everything visible and within reach. Group similar tools together – keep all wrenches in one spot, screwdrivers in another. This setup cuts down on time spent hunting for the right tool and helps prevent mistakes during reassembly.
Smart organization means faster, better work on your classic car project. When every part and tool has its place, you can focus on the actual restoration instead of searching for missing pieces.
Efficient Parts Labeling
Smart Parts Labeling Made Simple
Label your parts properly to make reassembly quick and easy. Start by creating a simple list of every part you remove, giving each one a clear name or number. Use strong labels that won’t fade or fall off – waterproof labels work best for most projects.
Keep track of everything with a basic spreadsheet on your phone or computer. Color coding helps too – try using different colors for engine parts, body panels, or interior pieces. This makes finding parts much faster when you need them.
Top labeling tips: – Write clear, readable labels – Take photos before disassembly – Group similar parts together – Store small parts in labeled bags – Keep a running inventory list
This organized approach saves time, prevents lost parts, and makes your project run smoothly from start to finish.
Tool Storage Solutions
Smart Tool Storage Makes Car Restoration Easier
Tools need a home just like parts do. Two main storage options help keep your workspace organized: custom shelves and portable tool chests.
Custom shelves create a permanent home for your tools, sorted by how often you use them and what they’re for. Big wrenches go together, screwdrivers stay in one spot, and measuring tools get their own section. This means you’ll find what you need quickly.
Portable tool chests let you bring your tools right to your car. These rolling cabinets have drawers and sections to keep everything sorted, even as you move around the garage. The best setup uses both shelves and chests – shelves for tools you use less often, and a chest for daily items you need close at hand.
Assembling the Chassis
Building a Chassis: Step-by-Step Guide
Start by lining up all frame parts carefully – this creates a strong foundation and ensures everything fits together correctly. Think of it like building with blocks – each piece needs to sit perfectly with the others.
Next, attach the suspension parts firmly to the frame. This step is crucial for how the vehicle will handle bumps and turns on the road. Make sure the weight spreads evenly across all mounting points.
Last, connect the brake lines with care. Run them along the safest path, away from hot or moving parts, and double-check all connections. Good brake line installation means reliable stopping power – something you can’t compromise on.
Aligning Frame Components
Frame Alignment Basics for Classic Cars
Getting your classic car’s frame properly aligned makes all the difference in how it looks, drives, and handles. Think of frame alignment like building a house – the foundation needs to be perfectly level for everything else to fit correctly.
4 Simple Steps to Check Frame Alignment: 1. Look over the entire frame for bends, rust, or damage 2. Use alignment tools to measure key points 3. Check measurements multiple times across the frame 4. Double-check everything after making adjustments
Why Frame Alignment Matters: – Creates a solid foundation for all other car parts – Ensures the car drives straight and handles safely – Helps maintain the car’s original specifications – Prevents uneven tire wear and steering problems
Tools You’ll Need: – Laser measuring devices – Frame gauges – Level bars – Measuring tape
Remember: Good frame alignment means better safety, smoother driving, and longer-lasting parts. Take your time with measurements – rushing this step can cause problems throughout the restoration process.
Securing Suspension System
A properly secured suspension system keeps your vehicle stable and comfortable on the road.
Start by connecting the control arms – these are the parts that help distribute your car’s weight evenly. Think of them like the arms that keep a balanced scale level. Next, install the springs and shock absorbers. Springs act like cushions, while shock absorbers prevent your car from bouncing like a pogo stick after hitting bumps.
Tighten all parts to the exact specifications in your manual. Getting the alignment right is crucial – even small errors can make your car handle poorly. When done correctly, your suspension will work smoothly, giving you better control and a more comfortable ride.
Make sure to double-check all connections and bolts for proper tightness. A well-installed suspension system results in: – Better handling around corners – Smoother ride over bumps – More stable braking – Even tire wear
Installing Brake Lines
Installing Brake Lines: A Safety Guide
Brake lines are crucial for your car’s safety – they need careful installation to work properly. Think of them like the veins in your body, carrying brake fluid to stop your car when needed.
The 4 Key Steps:
- Check Your Parts
- Look at all brake parts for rust or damage
- Make sure you have the right tools and fittings
- Clean all components before starting
- Position the Lines
- Route lines away from hot spots and moving parts
- Avoid sharp bends that could slow brake fluid
- Keep lines snug against the car’s frame
- Connect Everything
- Use correct fittings at each connection point
- Tighten connections firmly but don’t over-tighten
- Double-check all attachment points
- Test the System
- Fill with brake fluid
- Check for leaks at each connection
- Test brake pressure before driving
Remember: If you’re unsure about any step, consult a professional mechanic. Brakes are too important for guesswork.
Installing the Engine and Transmission
Installing an Engine and Transmission
The engine and transmission installation process needs careful handling and the right tools to ensure everything fits perfectly. A strong engine hoist lifts and lowers the engine into the car’s frame, lining it up with the motor mounts. Tighten all mounting bolts to the exact settings your car’s manual specifies.
Next, connect the engine’s vital monitoring systems. Hook up the oil pressure sensor to track engine health and attach coolant hoses between the radiator and engine. These connections keep your engine running at the right temperature and help prevent damage from overheating.
Finally, mount the transmission using a special transmission jack for support. Line it up carefully with the engine and secure all bolts to the proper tightness. This creates a solid connection between engine and transmission for smooth power delivery.
Fitting the Suspension and Brakes
Getting Your Classic Car’s Suspension and Brakes Right
A smooth-riding, safe classic car needs properly fitted suspension and brakes. Let’s break down how to do it right.
Suspension Setup: – Replace old, worn bushings with fresh ones – Set suspension arms to match factory specs – Adjust shock absorbers for the right bounce and control – Set tire pressure to match your suspension setup
Brake System Checks: – Look for brake line damage or rust – Remove air from brake lines through bleeding – Make sure brake pads sit correctly against rotors – Push brake pedal to test its firmness and response
Each part works together to keep your classic car safe and stable on the road. Take your time with these steps – rushing the job can lead to poor handling and unsafe braking. Regular checks help catch small issues before they become big problems.
Remember: Good suspension means better handling, while properly working brakes keep you safe. If you’re unsure about any step, it’s best to get help from a classic car specialist.
Reattaching the Body Panels
Body Panel Reattachment Guide
Putting body panels back on a classic car is like putting together a giant puzzle – everything needs to fit just right. First, gather the correct screws and bolts that match your car’s original hardware. This keeps the car looking authentic and ensures proper fit.
Line up each panel using guide pins or clamps to hold it in place. Check that the spaces between panels are even and match the car’s original look. When tightening bolts, work in a criss-cross pattern, similar to tightening wheel lug nuts. This prevents warping and keeps panels straight.
Finally, step back and look at the panels from different angles. They should sit flush against the car with smooth, even gaps. Good panel alignment not only looks better but also protects your classic car’s value and structural strength.
Wiring and Electrical Systems
Restoring Classic Car Electrical Systems: Essential Guide
Classic car wiring needs careful work to keep your vehicle safe and running well. Here’s what matters most:
Power Control Your car’s alternator and voltage regulator work together to protect electrical parts. Think of them as traffic controllers, making sure every component gets the right amount of power without overloading.
Battery Setup Pick the right battery for your classic car’s needs. Clean all connections, tighten terminals, and check regularly for green corrosion buildup. A well-maintained battery means reliable starts and better performance.
Wiring Layout Use correct wiring harnesses that match your car’s year and model. Route all wires away from hot engine parts and moving pieces. Proper wire placement prevents shorts and electrical fires.
Ground Connections Clean, tight ground points are vital for your electrical system. Bad grounds cause most electrical problems, from dim lights to complete system failure.
Test everything before closing up the hood. Keep your car’s wiring diagram handy – it’s your roadmap to success.
Interior Restoration and Installation
Interior Restoration: A Step-by-Step Guide
Bringing a classic car’s interior back to life takes careful work and the right attention to detail. The process starts with choosing the right fabrics – you’ll need materials that match the car’s original look in both feel and color.
First, check what can be saved and what needs replacing. Look closely at seats, panels, and trim. For the seats, focus on comfort while keeping the classic look. This means adding fresh foam padding that supports well but doesn’t change the original style.
Pay special attention to the stitching – straight, even seams make all the difference in the final look. When putting the dashboard and trim pieces back together, make sure everything fits snugly and works properly. Each part needs to line up perfectly to create that showroom-quality finish.
The goal is simple: restore the interior to look original while making it comfortable and functional for today’s driving. This balance between old and new makes the restoration truly successful.
Final Adjustments and Testing
Getting Your Classic Car Road-Ready
Final adjustments and testing make sure your restored classic car runs as good as it looks. Think of it like a complete health check-up for your car – every part needs to work perfectly together before hitting the road.
Quality Checks and Adjustments: – Engine Fine-Tuning: Set the right fuel mix and timing for smooth running – Brake Safety: Test brake pressure and pad position – Wheel Setup: Line up wheels for straight, stable driving – Electrical Check: Make sure all lights and systems work properly
Road Testing Steps: 1. Test drive at different speeds 2. Check handling on various road surfaces 3. Listen for unusual noises 4. Monitor engine temperature 5. Track fuel consumption
Each test helps spot potential issues early. Small tweaks during this stage prevent bigger problems later. A properly tested classic car runs reliably, drives safely, and keeps its value. Remember: rushing through final adjustments often leads to costly repairs down the road.
Frequently Asked Questions
How Do I Source Rare or Discontinued Parts for a Classic Car?
Finding rare car parts comes down to three main sources: online marketplaces, specialty suppliers, and classic car communities. The best places to start are dedicated auto parts websites like Rock Auto, CARiD, and Classic Industries, which stock hard-to-find components for vintage vehicles.
Car clubs and online forums are treasure troves for tracking down discontinued parts. Join local classic car groups on Facebook or forums specific to your car’s make and model. Members often share reliable supplier contacts and may even have spare parts they’re willing to sell.
Don’t overlook swap meets, salvage yards, and vintage auto shows. These in-person events let you inspect parts firsthand and build relationships with sellers who specialize in rare car components. Many sellers at these events aren’t online, making them valuable sources for unique finds.
What Are the Best Practices for Maintaining a Restored Classic Car?
Keeping a classic car in top condition requires two main things: smart storage and regular care. Store your car in a clean, dry garage to protect it from weather damage, and clean it thoroughly at least once a month.
Key maintenance steps: • Park indoors, away from direct sunlight and moisture • Use a quality car cover when stored • Clean and wax the exterior regularly • Check fluid levels monthly • Start the engine every few weeks • Keep tires properly inflated
Think of your classic car like a precious antique – the better you protect it from harm and keep up with basic care, the longer it will stay beautiful and running smoothly. Regular attention prevents small issues from becoming big problems and helps maintain both the car’s value and performance.
How Do I Ensure the Restored Car Meets Modern Safety Standards?
Making your restored car safe for modern roads means adding key safety features while keeping the car’s original charm. Start with the most important safety upgrades:
• Install modern brake systems with ABS for better stopping power • Add three-point seat belts to all seating positions • Update headlights and taillights for better visibility • Consider adding airbags if possible without compromising the dashboard • Upgrade steering and suspension components for better control
Work with a qualified mechanic who specializes in classic car restoration to ensure all safety upgrades meet current standards. They can help you choose safety features that fit your car’s design while meeting local regulations. Remember that some modern safety features may not be practical for all classic cars, so focus on the most critical safety improvements first.
What Is the Average Cost of Restoring a Classic Car?
Restoring a classic car typically costs between $20,000 and $100,000, with the final price depending on the vehicle’s condition and your restoration goals. A basic restoration of a car in fair condition might stay closer to $20,000, while full frame-off restorations of rare models can exceed $100,000.
Key cost factors include: – Parts availability and authenticity – Labor rates ($50-100 per hour) – Body and paint work – Engine rebuilding – Interior restoration
Most classic car projects take 6-12 months to complete, though complex restorations can stretch to 2 years. Smart budgeting means setting aside an extra 10-20% for unexpected repairs and replacement parts that surface during the restoration process.
How Do I Choose the Right Restoration Professional or Service?
Choosing the right restoration professional starts with 3 key steps: checking credentials, reading reviews, and getting detailed quotes.
Look for contractors who have: – Valid state licenses and insurance – Industry certifications (like IICRC) – At least 5 years of experience – Clear, written estimates – Local presence and references
Ask these essential questions: – Do you handle my type of restoration project? – Can you provide recent customer references? – What’s your response time for emergencies? – Do you offer a warranty on your work? – Will you handle insurance paperwork?
Get at least three quotes and compare: – Scope of work details – Timeline for completion – Materials and methods used – Total costs and payment terms – Emergency service availability
The best restoration professionals respond quickly, communicate clearly, and document everything in writing. Check their BBB ratings and online reviews, focusing on recent customer experiences within the past year.